
Redirecting...
You will be redirected to the specified link in 10 seconds.
Exercises/Facial yoga
Before
starting the exercise:
v
Before
starting the exercises, it is better to take green tea or apple juice.
v
During
exercise, our muscles use up the collagen in the body as the muscle contracts
and expands. After exercising and not having for a long time, the body automatically
burns and reduces the muscles.
v
Therefore,
eating easily digestible protein and heavy carbohydrate meals after exercising
will increase muscle mass and give a good body structure. Taking a post workout
supplement 30 minutes after the workout is most
effective.
v
You
can take protein milkshake, chocolate milkshake for instant energy.
v
If
you’re going to exercise in the afternoon or at night, you should do it two
hours after having. Half an hour before exercising, you can take some titbits.
v After waking up, the body muscles are tight. If you work out during that time, the muscles will suffer. First of all, the muscles should be relaxed before the exercise.
Warmup
exercise:
v
Before starting the exercise, sit up
straight in the chair and breathe deeply with a smile.
v
Place the feet on the floor, place
the palms on the thighs, close the eyes and inhale deeply for 10 times and
exhale.
Benefits:
v
The body gets the necessary oxygen.
v
Increases body temperature and helps
prepare for exercise.
Muscle
relaxing exercises:
v
Raise the right hand to shoulder
height and push the fingers back with the left hand. Do the same for the left
hand. It relaxes the elbow and biceps muscles.

v
Fold the left hand and bring it
behind the ear and press it to the right side with the right hand. Thus, the
triceps muscles are relaxed.

v
Fold the left leg backwards, hold it
with the hand and press it to feel the stretch of the thigh muscles.

v In the warmup position, sit with your eyes open and take deep breaths. Exhale slowly and turn the neck to the left, inhale and come back to the old position and exhale. When turning the neck, hold for two seconds. Similarly, the right side, upper and lower neck should be turned and practiced. Do this exercise thrice. When the right hand is folded and placed on the left ear and slight pressure is applied to the right side, the neck region will relax.
v
Stand straight and try to touch the big
toe with both hands. By this, the tightness of the hind leg muscles is eased.

v
Place the left leg on a slightly
inclined surface and push the body forward. Do the same for the right leg. This
will loosen the ankle.
1.
One leg standing:

v
Stand straight. One should stand with
the arms stretched out to the sides and the sides and the left leg folded as if
limping. Then, it should return to the old state. This exercise is then
repeated with the right leg. Do this 10times continuously.
Benefits:
v
Helps straighten the spine.
v
Helps to balance the body.
2.
Toe standing:

Stand straight. Lift only the heels without folding the
legs. We should stand with our entire body weight supported on the front of the
foot. Hold this position for 15 seconds. Then, it should return to the old
state. Repeat this for 10 times.
Benefits:
v
Helps straighten the spine.
v
Helps balance the legs.
v Frenkel’s
exercise is used to retrain proprioception and coordination, with particular
focused on the lower limb; therefore, it was assumed that it would improve
lower limb sensation and function in stroke patients with impaired sensory function.
v Frenkel’s
exercises are used to bring back the rhythmic, smooth and coordinated
movements.
v For
those patients with the prerequisite abilities, they may be helpful in
regaining control of movement through cognitive compensation strategies.
v Avoid fatigue. Perform
each exercise not more than four times. Rest between each exercise.
Frenkel exercises for lower limb:
1.
Exercise for the legs in lying:
v
Flex and extend one leg by the heel
sliding down a straight line on the table.
v
Abduct and adduct hip smoothly with
knee bent and heel on the table.
v
Abduct and adduct leg with knee and
hip extended by sliding the whole leg on the table.
v
Flex and extend hip and knee with
heel off the table.
v
Flex and extend both the legs
together with the heel sliding on the table.
v
Flex one leg while extending the
other.
v
Flex and extend one leg while taking
the other leg into abduction and adduction.
v
Heel of one limb to opposite leg.
v
Heel of one limb to opposite knee,
sliding down crest of tibia to ankle.
v
Whether the patient slides the heels
or lifts it off the bed he has to touch it to the marks indicated by the
patient on the plinth.
2.
Exercises for the legs in sitting:
v
One leg is stretched to slide the
heel to a position indicated by a mark on the floor.
v
The alternate leg is lifted to place
the heel on the marked point.
v
From stride sitting posture patient
is asked to stand and then sit.
v
Rise and sit with knees together.
v
Sitting hip abduction and adduction.
3.
Exercises for the legs in standing:
v
In stride standing weight is
transferred from one foot to other.
v
Place foot forward and backward on a
straight line.
v
Walk along a winding strip.
v
Walk between two parallel lines.
v
Walk sideways by placing feet on the
marked point.
v
Walk and turn around.
v
Walk and change direction to avoid
obstacles.
Frenkel exercises for upper limb:
v
The patient flexes the right shoulder
to 90 degree with elbow and wrist extended.
v
The patient then takes his or her
index finger and touches the tip of his or her nose. This exercise is then
repeated with the left hand.
Exercises to promote movement and
rhythm:
v Sitting: One
hip flexion and adduction.
v Half lying: One
leg abduction to bring knee to side of plinth, followed by one knee bending to
put foot on floor, the movement is then reversed and repeated.
v Sitting: lean
forward and take weight on feet, then sit down again.
v Standing: Arms
swing forwards and backwards.
v Standing or walking: Bounce
and catch, or throw and catch a ball.
1.
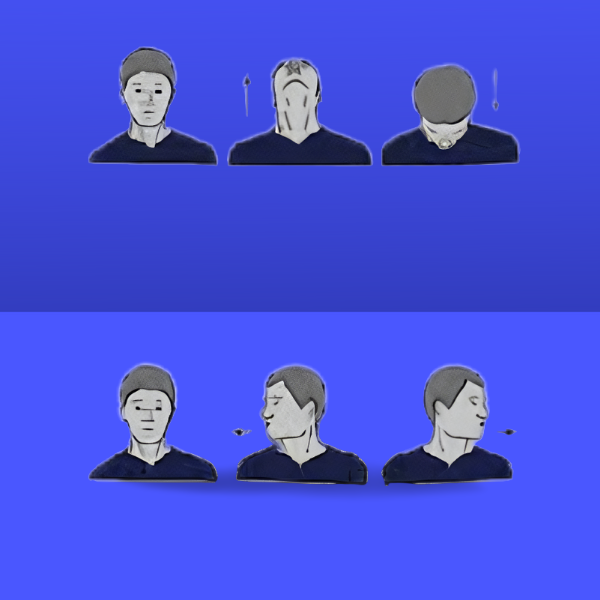
Kapal Randhra Dhouti:
Kapal=Skull; Randhra=Hole or cavity; Dhouti=Cleansing
of the skull. The amount of dust we inhale and adulterated food and poisonous
drinks we are daily swallowing, clogging throughout biophysical mechanism is
unavoidable. The cavities of the skull accordingly suffer from dust
accumulation, pollutants, and accumulation of excess phlegm. Kapal Randhra
Dhouti is very effective tool to combat everyday stresses and pollutants and
its harmful effects.
Note:
Hands, neck, and face should be clean before you do
this yoga.
Method:

·
Sit padmasana position or normally.
Place thumb on one side of the temple. Using forefingers massage the forehead
with the fingers.
·
Massage the area around the eyes in a
circular motion using the index and middle fingers.
·
Place the thumb on the cheek and the
remaining four fingers on the top of the cheek and apply slight pressure.
Massage the cheeks in an upward direction. Put the hands on the cheeks and
gently rub like washing the face.
·
Massage sides of the face and behind
the ears back and forth.
·
Tilt the head back and place the
hands up and down over the throat area. It should remain in this position for a
few seconds. Then, it should return to the old state.
Benefits:
·
The face becomes radiant and the
facial fat is reduced. This invigorating yogic facial massage stimulates the
facial nerves and the blood circulation to the face is improved. This will
render a natural facial glow over a period of time.
·
Helps in peace of mind.
·
Massaging thoroughly helps to reduce
stress and thereby helping people suffering from insomnia, pre-mature aging,
facial wrinkles etc.
·
Common problems office goers face
such as headaches and migraines are reduced.
·
Nervous system has a chance to calm
down, in this way kapal Randhra Dhouti also helps against depression.
2.
Smiling fish:

With a soft smile, it should be done as if pulling the
chin in. Lips should be pursed like a fish. It should remain in this position
for a few seconds. Then, it should return to the old state.
Blow kisses:

The head should be tilted back and gazed towards the
sky. Now, accumulate the lips and place them as if giving a kiss. It may be in
this position for a few seconds. Then, it should return to the old state. You
can do this exercise 10 times with a little break.
Puppet Face:
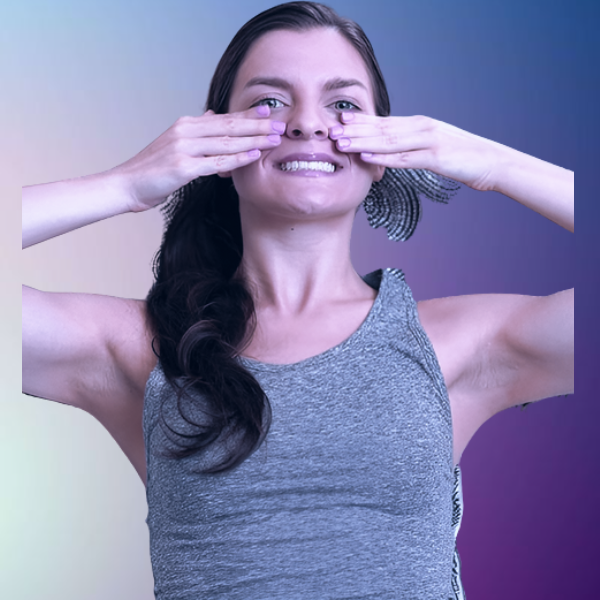
Place two fingers above the lips and on either side of
the nose. Push up and down gently to create resistance while simultaneously
smiling. This exercise should be done above the lips only.
Surprise me:

Keep your face normal. Now, change the facial expression
to look surprised. It should return to the old state. Do the same 5 times
alternately.
Benefits:
v
The face becomes radiant and the
facial fat is reduced.
v
Improves blood circulation in facial
muscles.
v
Helps reduce fat on cheeks.
3.
Kiss and Smile:

Method:
Push the lips out as much as you can, as if you are
about to kiss and then smile broadly. Do at least 15 repetitions a day. This
exercise works on the cheeks and chin simultaneously.
Benefits:
When use these muscles often and in a specific way, it
can improve the downward drift to a youthful jawline and flushed cheeks.


No comments:
Post a Comment